How can I upload photos to my listing on Allhomes?
You can upload photos to a listing via the listing details page in Agent Portal.
We’ll show you how to upload and re-order images on a listing that is already on Allhomes, and also take a look at image specs.
First, you will need to login to Allhomes and find your listing. See this article for more info: Search for listings on Allhomes.
Uploading Photos and Floorplans
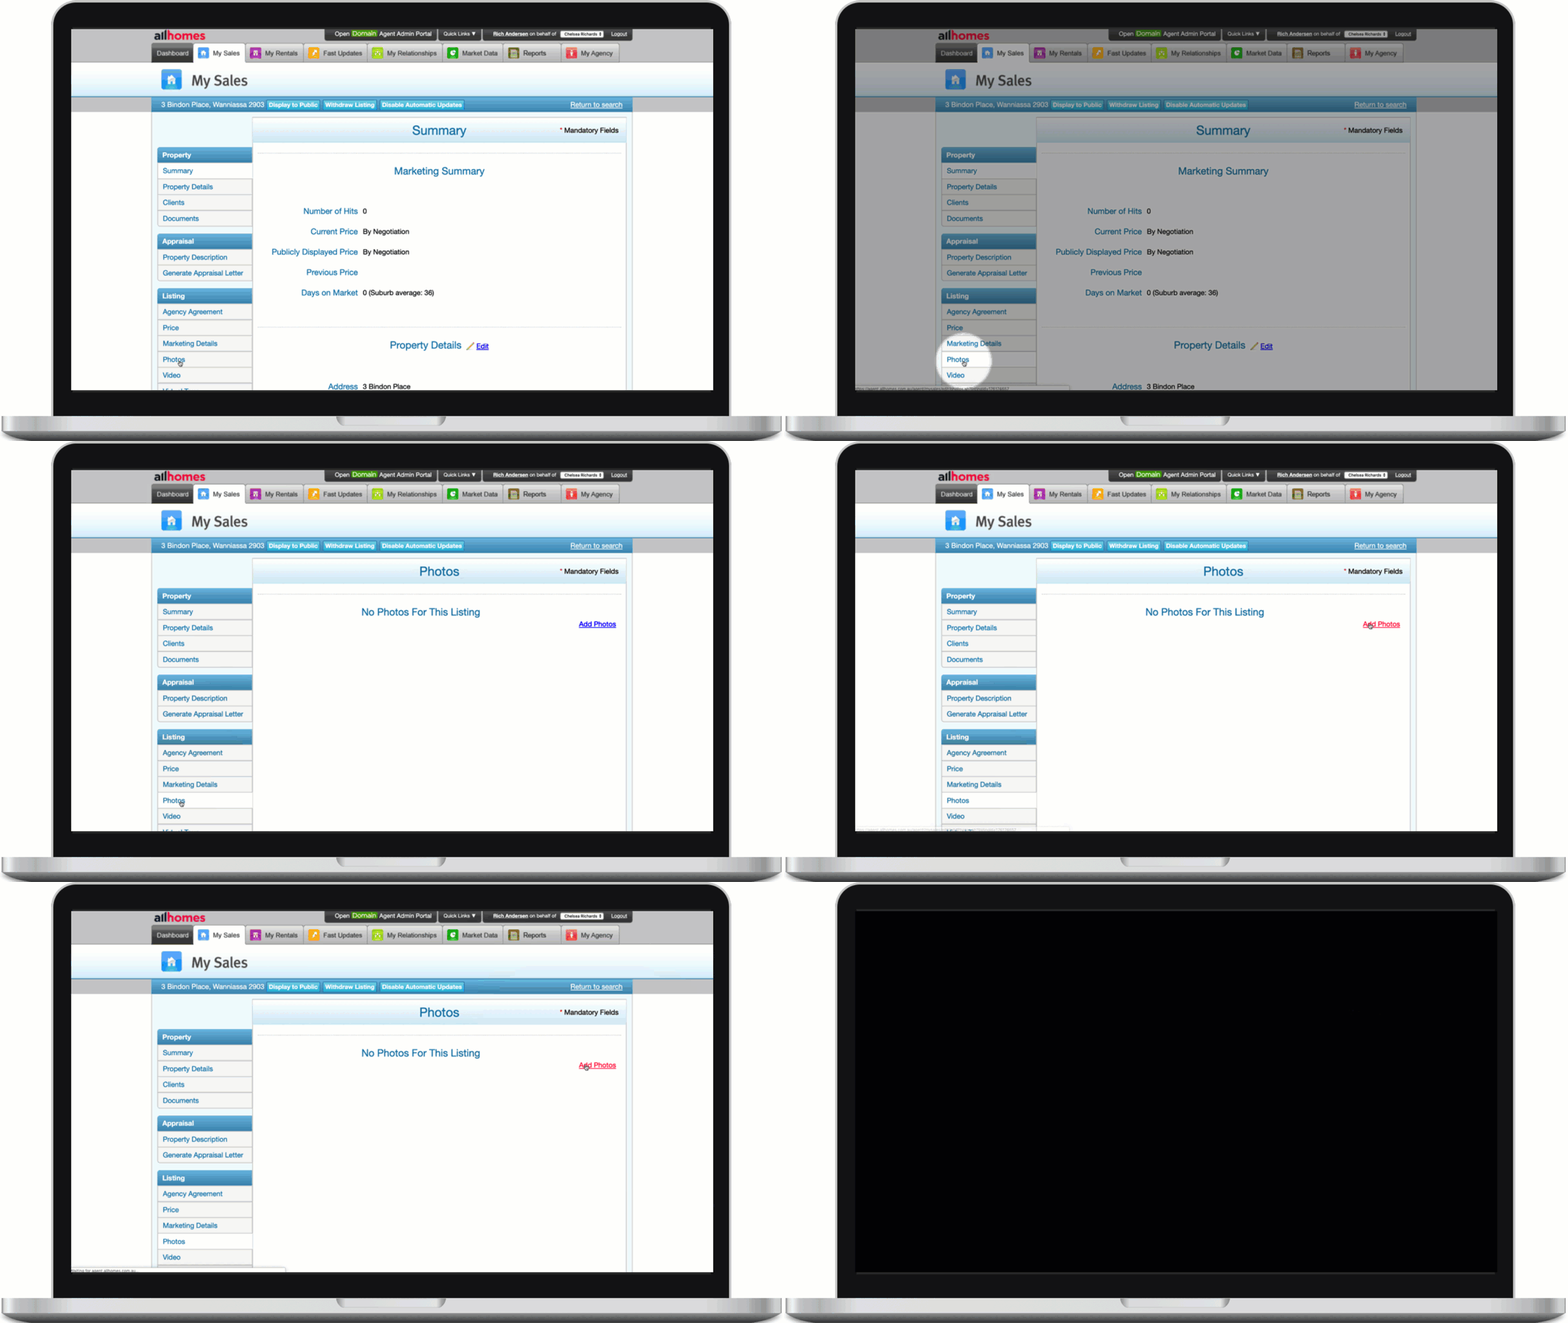
- Once you have your listing details page open, click on Photos from the side menu then click Add Photos

Note:The first image loaded will be used in the search results and the first three images will be used in the listing details page.
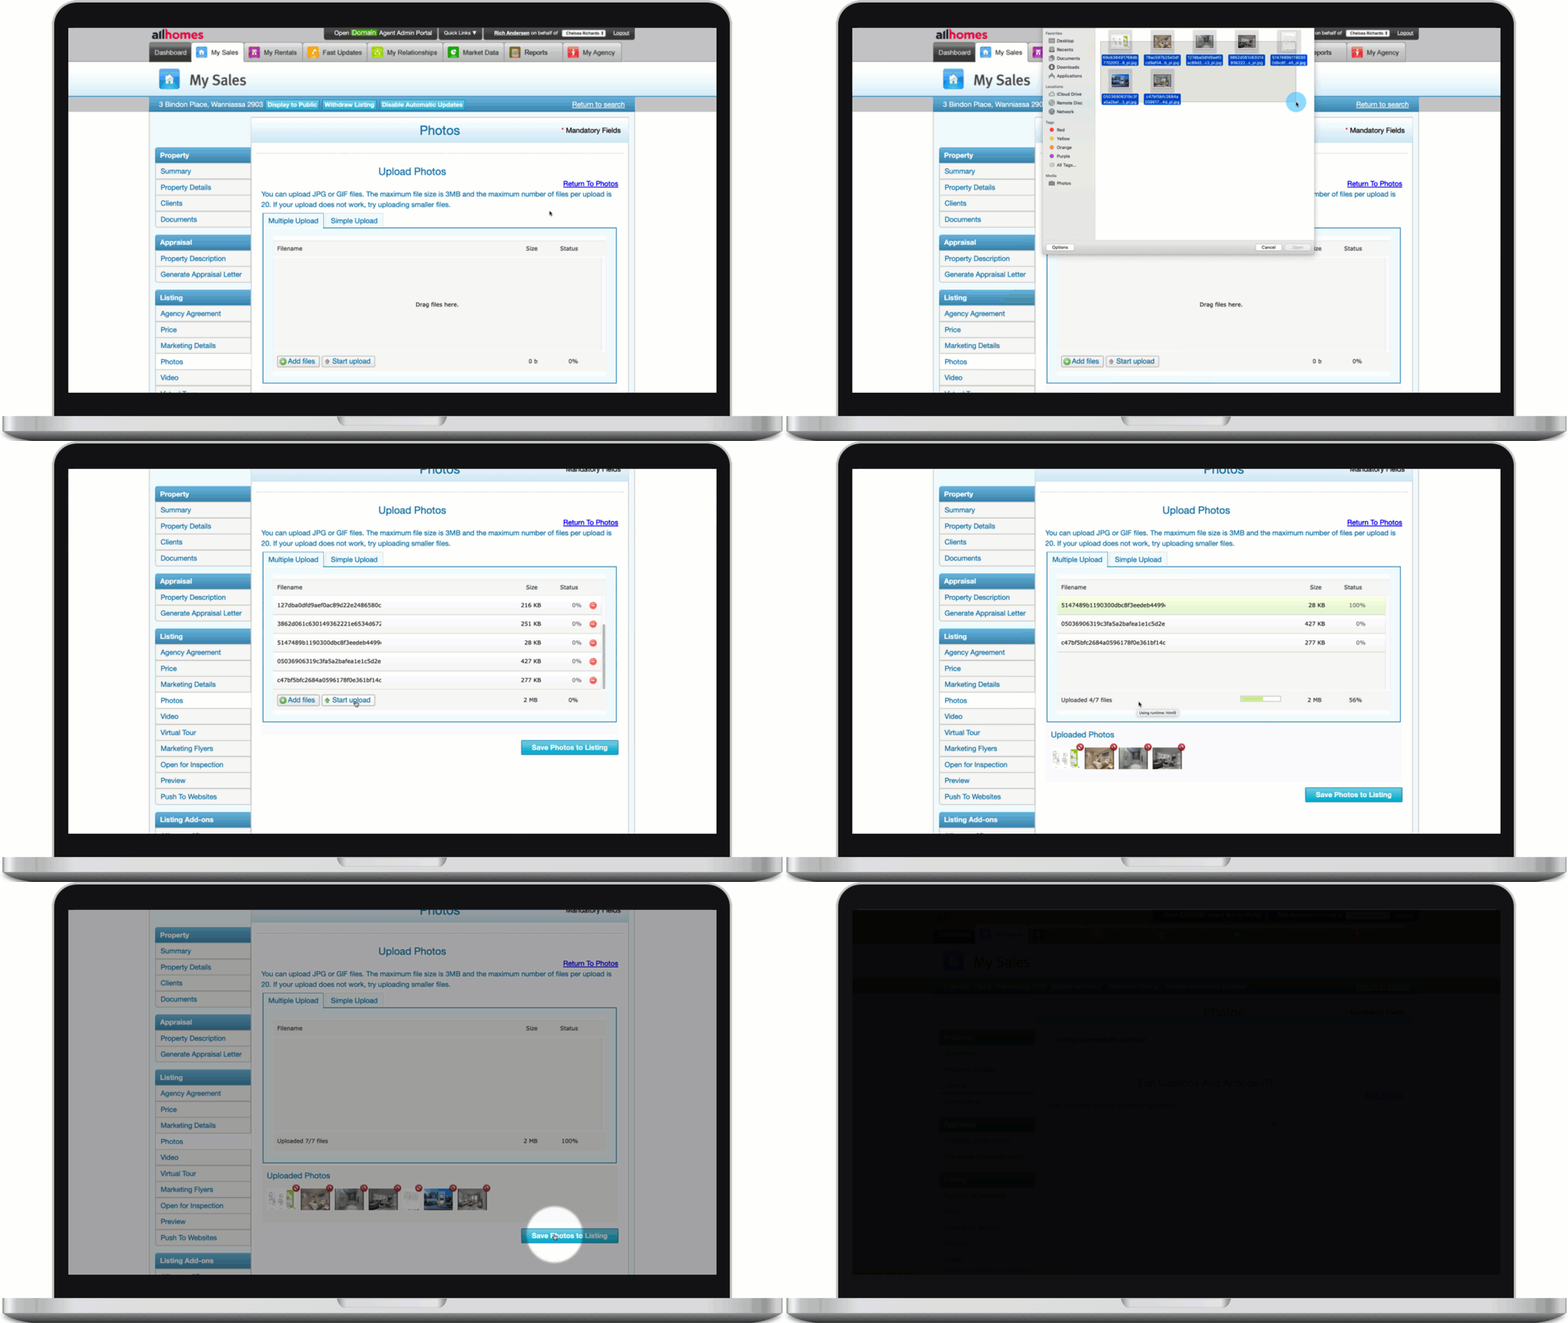
- Your photos should be saved either in a folder on your computer, or on the ‘desktop’. Go to the location on your computer where your photos are, select all the photos you’d like to use. Click Open or you can drag them into the photo manager.
- Click Start Upload.
- Once images have loaded click Save Photos To Listing
- Read the agreement and click continue.

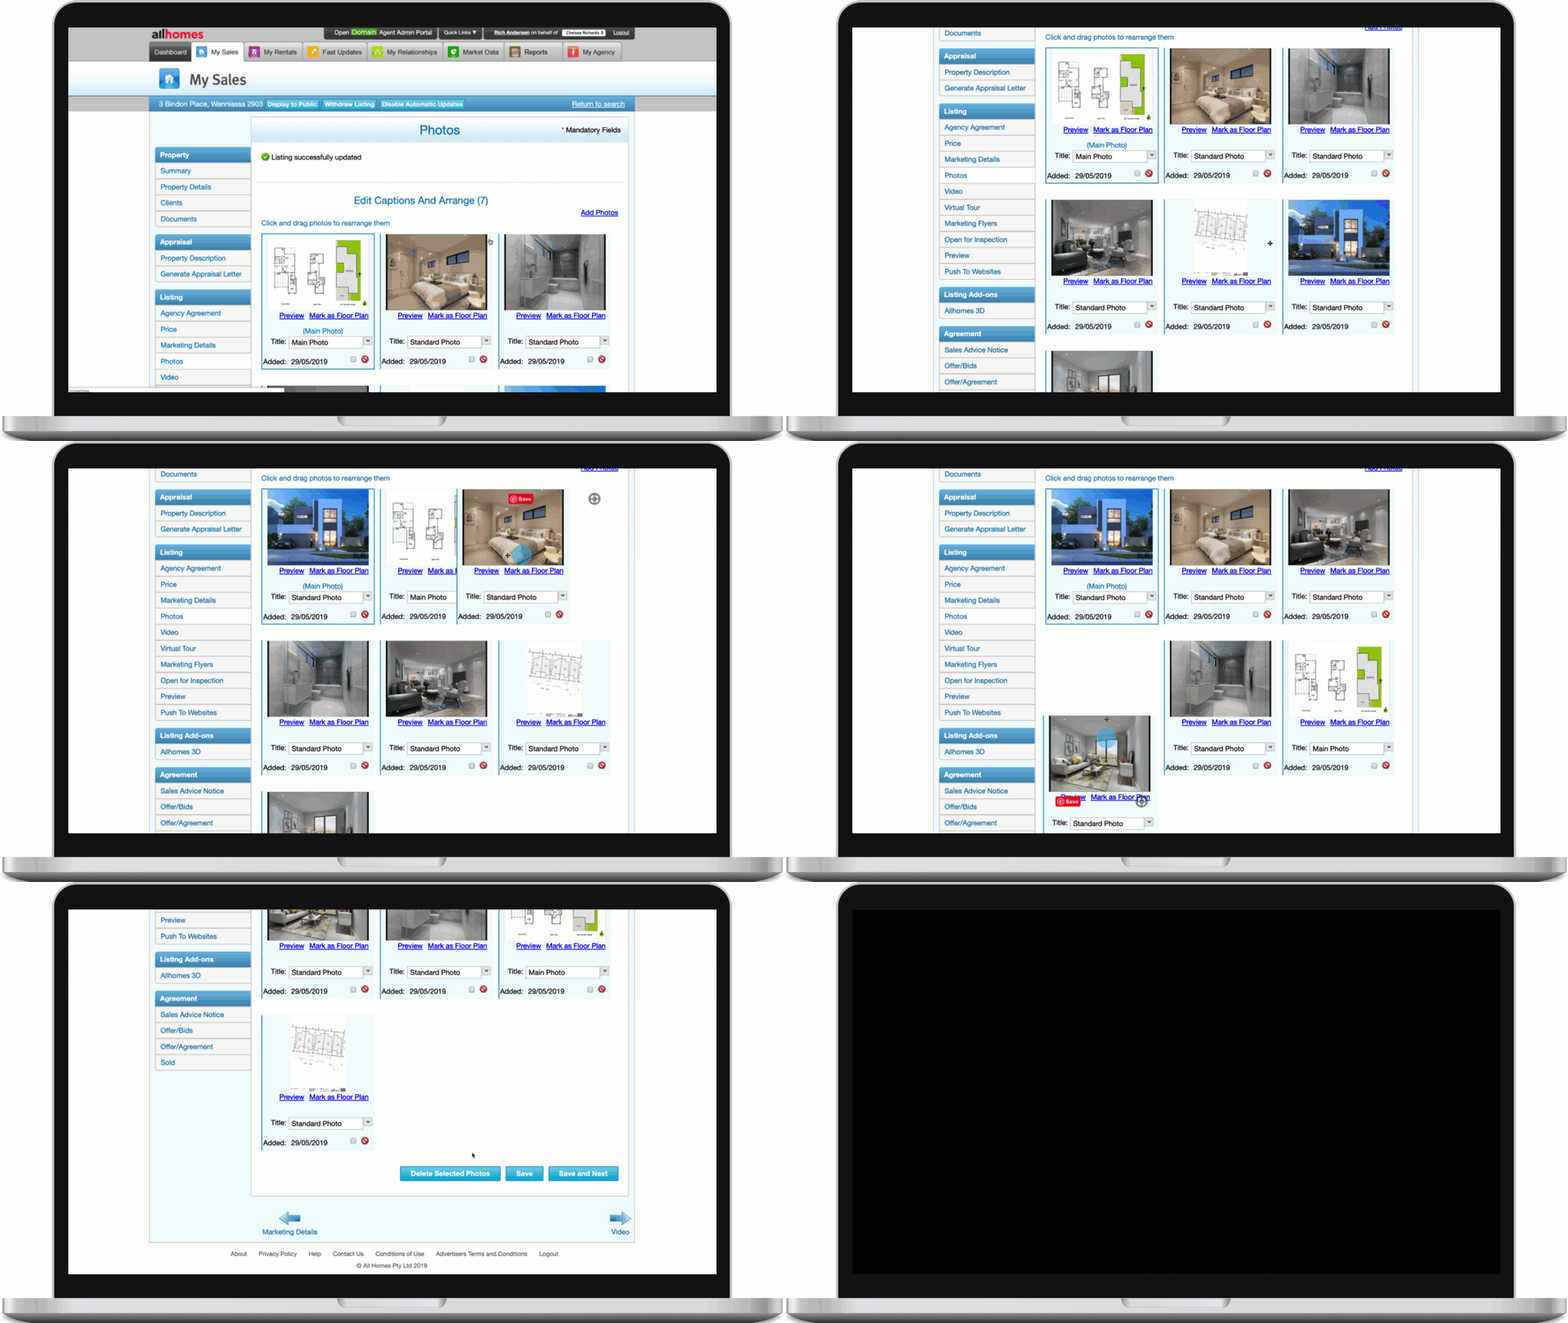
- On the next screen you can drag images into the correct order, set one of the images as floorplan, add captions or delete photos.
- Click Save.

Photo Specs
For the best results, Images must conform to these specifications:
Filetypes: JPG, JPEG
Size: 1600px(w) by 1200px (h) minimum. Images below 800px X 600px will not render on site
Optimum Ratio: 4:3
Filesize: Up to 3MB
If your upload does not work, try using the Simple Upload function.
Comments
Please sign in to leave a comment.